
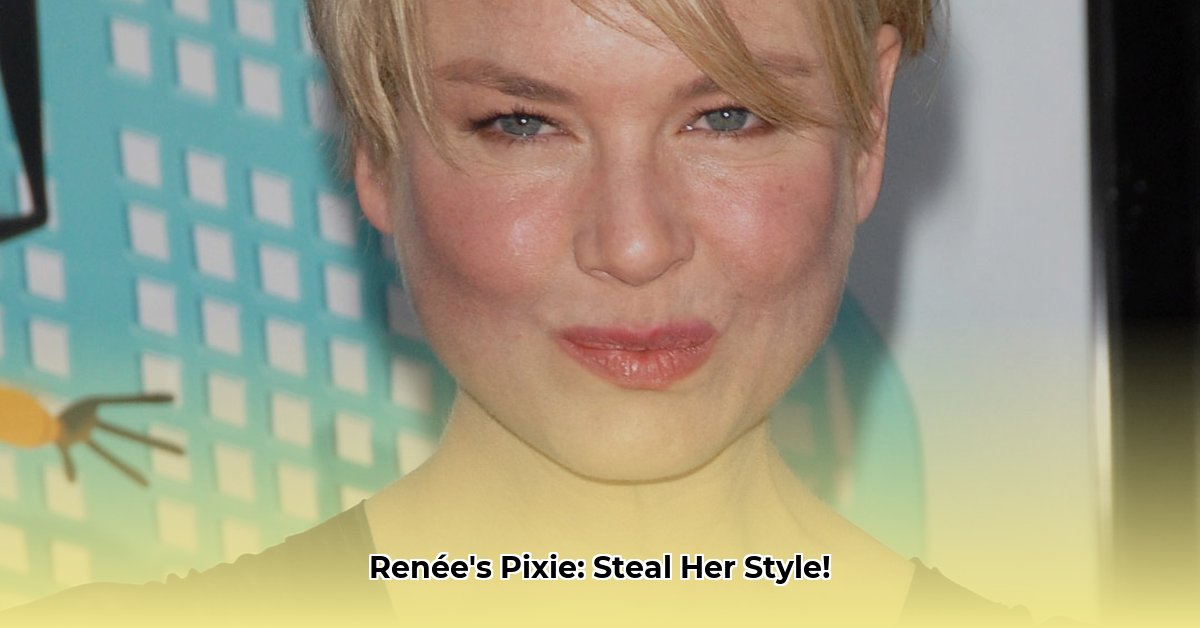
Renée Zellweger’s pixie cut, as seen in British Vogue, has become incredibly popular. Its chic versatility, crafted by stylist Syd Hayes, makes it a look anyone can adapt. This tutorial provides a step-by-step guide to achieving and maintaining this iconic style.
Deconstructing the Zellweger Pixie
This isn’t just any pixie; it’s a modern interpretation of a classic, incorporating elements of David Bowie’s rebellious style with a touch of Hollywood glamour. The cut features a close crop at the nape of the neck, gradually lengthening towards the crown with textured layers that frame the face. These layers are key to the cut’s versatility, allowing for both sleek and tousled styling options. It’s a contemporary take on short hair, predicted to be a major trend in 2024.
Essential Styling Tools
Before you begin, gather your pixie toolkit:
- Volumizing Spray: https://product-link-1Sam McKnight’s Cool Girl Superlift Volumising Spray is highly recommended for lift and texture, but any quality volumizing spray will work. This is particularly crucial for fine hair.
- Texturizing Paste/Cream: A lightweight product like https://product-link-2Hershesons Almost Everything Cream is ideal for defining layers and creating that piecey, lived-in texture without stiffness. Avoid heavy waxes or gels.
- Vent Brush: Essential for directing airflow and creating volume during drying. A round brush can also work but may not provide as much lift.
- Hairdryer: A powerful hairdryer like the https://product-link-3BaByliss Air Power Pro will expedite drying and enhance styling control.
- Fine-Tooth Comb: For precise parting and creating defined sections.
(Consider affiliate links for product recommendations)
Styling Guide: Step-by-Step
Prep: Start with clean, damp hair, towel-dried to remove excess moisture. Too much water dilutes products and weighs hair down.
Volumize: Apply volumizing spray liberally to the roots, focusing on areas where lift is desired. Avoid over-spraying the ends to prevent a stringy appearance.
Dry with Purpose: Using your vent brush and hairdryer, lift hair at the roots, directing the airflow upwards. Employ the Vidal Sassoon wrap-dry technique for added bend and movement. This involves wrapping sections of hair around the brush and directing the heat along the curve.
Texture: Warm a pea-sized amount of texturizing paste/cream between your palms and work it through the ends, twisting and defining individual pieces. Don’t overload the product; less is more.
Style:
- The Zellweger Sweep (Side Part): Create a deep side part. Allow the longer layers to fall naturally, framing your face. Apply a touch of styling paste to the ends for definition.
- Slicked Back: Comb hair straight back, using slightly more styling paste for a polished, sleek finish.
- Bowie Bend: For added flair, use your fingers to create a slight wave or bend in the front sections.
Set (Optional): A light-hold hairspray can secure the style without sacrificing movement. Avoid heavy sprays to maintain a natural look.
Variations and Personalization
- Accessories: Headbands, clips, or scarves can personalize the pixie.
- Color: Consider highlights or lowlights to add dimension and depth.
Maintenance
- Trims: Schedule trims every 4-6 weeks to maintain shape and prevent awkward grow-out. Communicate with your stylist about your preferences.
- Product Use: Continue using the volumizing spray and texturizing product for upkeep.
- Deep Conditioning: Regular deep conditioning treatments maintain hair health and vibrancy.
Troubleshooting
| Problem | Solution |
|---|---|
| Cowlicks | Apply extra product and direct airflow downwards to smooth. |
| Lack of Volume | Focus on root lift during drying; consider a volumizing mousse. |
| Frizz | Use a smoothing serum sparingly. |
Adapting to Hair Types
These techniques may require slight adjustments depending on your hair type. Fine hair may benefit from lighter products, while thicker hair may require stronger hold. Experiment to find what works best for you. Ongoing research in hair care suggests that personalized techniques are key to optimal results.
Conclusion
Achieving Renée Zellweger’s pixie cut is attainable with the right tools, techniques, and a dash of confidence. This tutorial provides a roadmap, but don’t be afraid to experiment and personalize the look to make it your own. Share your pixie success stories!
Author
Related Posts:
- Renée Zellweger's David Bowie-Inspired Haircut: A Style Breakdown

- Zoe Saldana's Golden Globes Dress 2025: All the Details
- Golden Globes 2025 Fashion: Red Carpet Hits and Misses
- Jonathan Van Ness's Showstopping 2025 Golden Globes Look: All the Details
- Jeremy Strong's Turquoise Loro Piana Velvet Suit: A Golden Globes Fashion Moment
- Debenhams Watch Sale (Luxury Discounts): A Look Back & Where to Find…


: A Look Back & Where to Find Similar Deals Now")
